Elegant and Delicate Wedding Invitations for a Beautiful Day


Quick Lessons:
- With all-inclusive invitations, cost savings will stem from the overall event.
- Elements of personal detail are rich in quality & grace.
- Do not have to rush into an assembly – use advanced planning!
- High-quality cardstock guarantees quality printing.
- Nice special touches impress all strivers.
DIYing is something that can be applied to almost anything, and wedding invitations are no exception. If you want your invitations to look elegant and intimate without spending too much from your pocket – go for DIY wedding invitations. If you are a beginner to DIYing, stay with us in this article and learn how to make an elegant and delicate wedding invitation on your own.
Getting Started with DIY Wedding Invitations
Crafting your own wedding stationery allows you to personalise every detail while staying mindful of your budget. With just a bit of creativity and time, you can design a unique suite that truly reflects your love story.
Here are the top 6 ways to DIY your wedding invitations. Have a look at them.
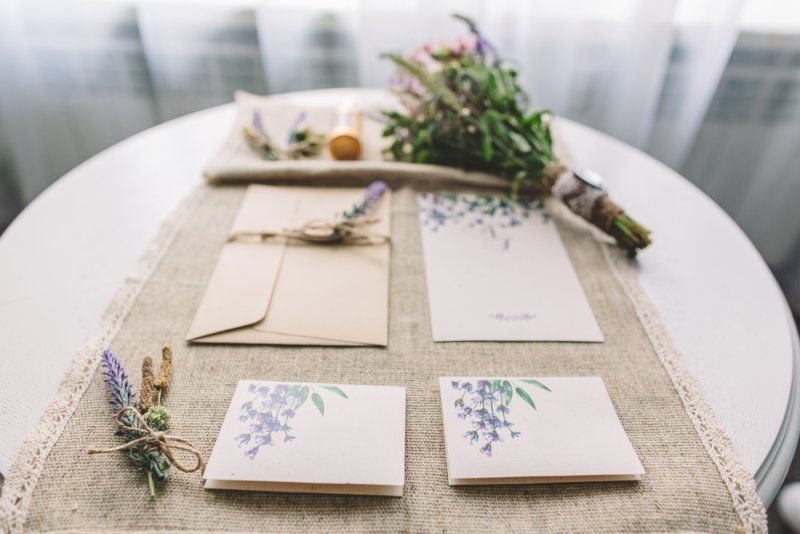
Handwrite All The Wedding Invitations
Writing all of the wedding invitations on your own may look tedious and illogical to some of you, but the fact is, it does work pretty well. Handwriting your own wedding invitations makes them look more inviting and welcoming.
You can try out different fonts and handwriting styles or ask your friend, who is known for stylish and unique handwriting, for help. This may look a bit time-consuming, but if you have already made up your mind that you will DIY your wedding invitations, nothing is impossible.
All you need to do is start early so that you do not hurry while writing down wedding invitation essentials. While doing so, make sure you follow wedding invitation etiquette.
Also Read: Benefits & Ideas for Wedding Invitations With QR Codes
Accessorise It With Laces
If your invitation looks plain and too simple for the wedding, try adding a bit of glam using lace or raw-edge silk. Laces on wedding invites are nowadays in trend, and you can actually take advantage of this.
There are so many beautiful designs and lace patterns that you can get from any general store. Using lace on wedding invitations actually enhances their beauty.
You can either add single strips of lace on the edges or use a predesigned lace pattern for the entire wedding invitation. In either case, you will be adding a bit of glam to your wedding invitation. So, just go for it.
Add Some Flowers
Flowers stand for romance, love, and class, and the same can be delivered to your wedding invitations. Here, we are focusing on using some flower pictures in your wedding invitations. You can either paste them over your cards or creatively staple them.
Want to add more value? Go for real pressed flowers – maybe pressed roses. You can easily get a bunch of pressed flowers from any flower store, but in case you do not want to waste time finding out the right shade of pressed flowers from a million flower petals, go online.
Several online stores sell real pressed flowers online and deliver them to your doorstep. So, order them, buy them, and add them to your wedding invitation to make it look more elegant and delicate.
Seal With Custom Wax Stamps
The classic wax seal will add a definite blast of old-school glamour to your wedding invitations. It is simple to order personalised wax stamps with your merged initials, monogram, or perhaps a tinge of flower.
It's best to use blush-red, gold, or classic sage-coloured wax beads to create an invitation palette that is ideal to match. Melt the wax over the cover flap, press and set – for a beautiful, tactile result.
Must Read: Digital vs. Paper Wedding Invitations
Wrap With Silk Or Chiffon Ribbons
Ribbons can be used to gracefully organise an invitation suite while keeping it simple and elegant. Quality silk, velvet, or frayed-edge chiffon ribbon wraps neatly around your cards to keep things tidy.
Tie in a simple knot or traditional bow to create a soft, romantic element of visual texture. It will make a simple collection of stationery into an all-embracing gift that your guests really enjoy unboxing.
Emboss With Personalised Stamps
A sophisticated raised print, without the high cost of a professional printing press that would normally be used, is what embossing allows you to achieve. You can use a hand embosser to easily emboss custom monograms or hand-drawn scribble designs or to emboss blind.
Just slide your cardstock or envelope flap through the tool, press enough, and pull up your paper! This gives a crisp, tactile effect overall that will make the entire appearance of your custom suite more arresting, with striking appeal.
Don’t Miss: Discover the Best Time Frame to Send The Wedding Invitations
Wrapping Up
No matter what month of the year you are getting married, a DIY wedding invitation is something that you can actually make for any wedding ceremony. All you need is a passion for DIYing, some crazy yet helpful friends, a couple of things to accessorise, and of course plenty of time.
If you have it all, go ahead with DIY wedding invitations and wow your wedding guests. Hope this works for you.
Frequently Asked Questions
When should you send out DIY wedding invitations?
Your main invitations can be sent 6 to 8 weeks before your wedding day (or 3 to 4 months prior if you're hosting a destination wedding). This will provide guests enough time to RSVP, and you will have some time to ensure you have your fitted, crafted suites ready for them as well.
What paper weight is best used to minimise ink bleed and flimsy cards?
Use 100lb – 130lb (270gsm – 350gsm) heavyweight cardboard for a crisp pro look. Higher GSM paper has a longer lifespan in calligraphy since the ink will not roll over from that side and the paper will not tear when it is glued to or struck with a hot or cold wax seal.
What is the solution to the matter of handmade invitation suite postage surcharges?
Ensure a “full” sample suite is checked at a post office before purchasing because thick cardstock or ribbons or “wax” seals must be paid for separately with non-machinable stamps. There is no standard type of stamp that will cover a custom DIY bundle.
What's the best way to get RSVPs cheaply?
Provide a QR code or a free wedding website for guests to sign up on, rather than one or more of the traditional response cards, saving on the cost of having postage returned. If using traditional mail inserts, put an outgoing stamp on the return envelope to get timely mail.
How can I make sure all text is aligned accurately when printing at home?
Print with a "test" print from the available downloadable templates that are sized to standard paper to allow you to experiment with your final cardstock in actual print. Don't forget to check the configuration of your printer and set paper type to "Thick" or "Heavyweight"; otherwise, you might experience paper jams.
This content was created by AI


